PROGRAM
Open Excel. It will automatically open all the files in C:\BURWEN AUDIO. Go to Start, All Programs, Burwen Audio, and click to open Burwen Audio, a
C++, C#, Direct Show program that digitally processes a 2, 5.1 or 7.1 channel audio signal. AUDIO SPLENDOR.XLS is a huge 51 MB Excel workbook
that contains 1,400,000 long formulas for generating all the tone control, reverberation, and mix parameters it sends to Burwen Audio. SPLENDOR
LIBRARY.XLS stores the TONE CTRL settings for each piece of music. When recalling your settings it retrieves the reverberation parameters from
AMBIANCE NORMAL LIBRARY.XLS, and other settings from MIX, RVRB MIX, SPKR COMP, and SOURCE COMP libraries in AUDIO SPLENDOR.XLS.
You can save a custom mix in the MIX LIB worksheet of SPLENDOR LIBRARY.XLS, and a custom reverberation mix in the RVRB MIX LIB worksheet of
AMBIANCE LIBRARY.XLS.
AUDIO SPLENDOR.XLS can connect to Burwen Audio, either on this computer or over your network to Burwen Audio on another computer, for remote
control. Each click on the PROCESS AUDIO button renews connection to Burwen Audio and the Windows Media Player and sends the tone,
reverberation and mix parameters.
NORMAL LISTENING
Screens
For normal listening, two windows, TONE CTRL and RVRB SEL provide all the controls you need for all your channels. There are more controls, raising
the total to 310 sliders and 357 buttons, using Pg Dn and the MIX and RVRB tabs, but they are rarely needed. Read the gold, green and red instructions
in each window for help.
Tone Controls
On the TONE CTRL screen set the 43-position INPUT CH - SPKRS horizontal slider at “2 - ALL” for stereo input or “5 – ALL, FC MIX” for multi-channel
input. Set the VOL slider at right and click PROCESS AUDIO. If there is no sound from your analog input, click the MIX tab, Pg Dn and click the
ANALOG button; then PROCESS AUDIO again on either screen.
Adjust the sound to your taste using the 11 tone sliders at left and occasionally adding one or more at the right. You can see the composite frequency
response or that of a single slider by pressing GRAPH. Compare 2-channel bypass to your multi-channel settings by repeatedly pressing 2BP. Try other
INPUT CH – SPKRS mixes and fine tune with the RVRB and REAR level controls. LEFT-RIGHT BAL is at top left. Compare your settings (click EQ) vs.
saved settings (click FILE) vs. flat (click FLAT).
Reverberation
On the RVRB SEL screen select a pleasing ambiance. Try many of the 313 selections and check mark your favorites. As you become a more
experienced listener you will realize the importance of subtle differences in transient response, smoothness, ambiance, clarity, fullness, distance, and the
apparent size and shape of the listening space. At the right of each button are the maximum delay times for each channel.
No Screech
Many vocal recordings and some instrumentals can be equalized to sound good during quiet passages, but burn your ears with screechy high notes. No
Screech dynamically attenuates the 3000 Hz region only during the loudest high notes without muffling the quiet passages. As you approach
the optimumslider setting, use it like a tone control, adjusting in tenths of a DB.
Difference Controls
Sometimes recordings have problems that need correction in fewer than all the channels. After adjusting the main tone controls to near optimum, go to
the difference controls for fine tuning, by paging down. Separate tone controls of the same types as the main controls allow you to make fine differences
in the front center FC, rear plus sides R + S, left-right L – R, side – rear S – R, rear left–-rear right RL - RR, and side left–-side right SL – SR. These
controls are especially useful for compensating asymmetry in you speaker and room, and saving it to be selected by SPKR COMP. The optionally
separate FC NO SCREECH control is for movies and vocals. A HUM filter can notch out 50, 100, and 150 Hz or 60, 120, and 180 Hz with hardly any
effect on the music. For restoring or cutting off low bass or extreme high frequencies use the 15 Hz and 25 kHz peaking controls in addition to identical
controls on the main screen. Together they boost or attenuate as much as 60 dB in 0.1 dB steps, providing more than 12 dB/octave. GRAPHS show the
frequency response curves of all the controls in dB.
SAVING SUBWOOFER SETTINGS
Actual subwoofer settings, speaker compensation, and source compensation are saved with your tone, reverberation, and mix settings in the TONE
LIB. If you have later changed your speaker compensation or subwoofer settings and selected the same SPEAKER compensation you will hear the
sound with the new settings. You can change compensation to another speaker of headphone type with this slider for similar sound. The first and
unnamed positions are FLAT; they eliminate speaker compensation, but use current subwoofer settings. The second SAVED position in FILE mode
recalls the original subwoofer and speaker compensation heard at the time the settings were saved. Named speaker compensation positions recall
saved speaker and subwoofer settings. Original SOURCE compensation is always combined into recalled tone settings.
SYSTEM CONFIGURATION
Change the use, channels, sample rate, and library recall actions as instructed, at the bottom of the MIXER.
HELP AND SUPPORT
Burwen Technology, Inc.
12 Holmes Road
Lexington, MA 02420-1917
Websites: www.burwenaudio.com
www.burwenbobcat.com
| |
| |
| |
| burwenaudio.com |
| AUDIO SPLENDOR HOW TO USE IT READ EACH STEP CAREFULLY |
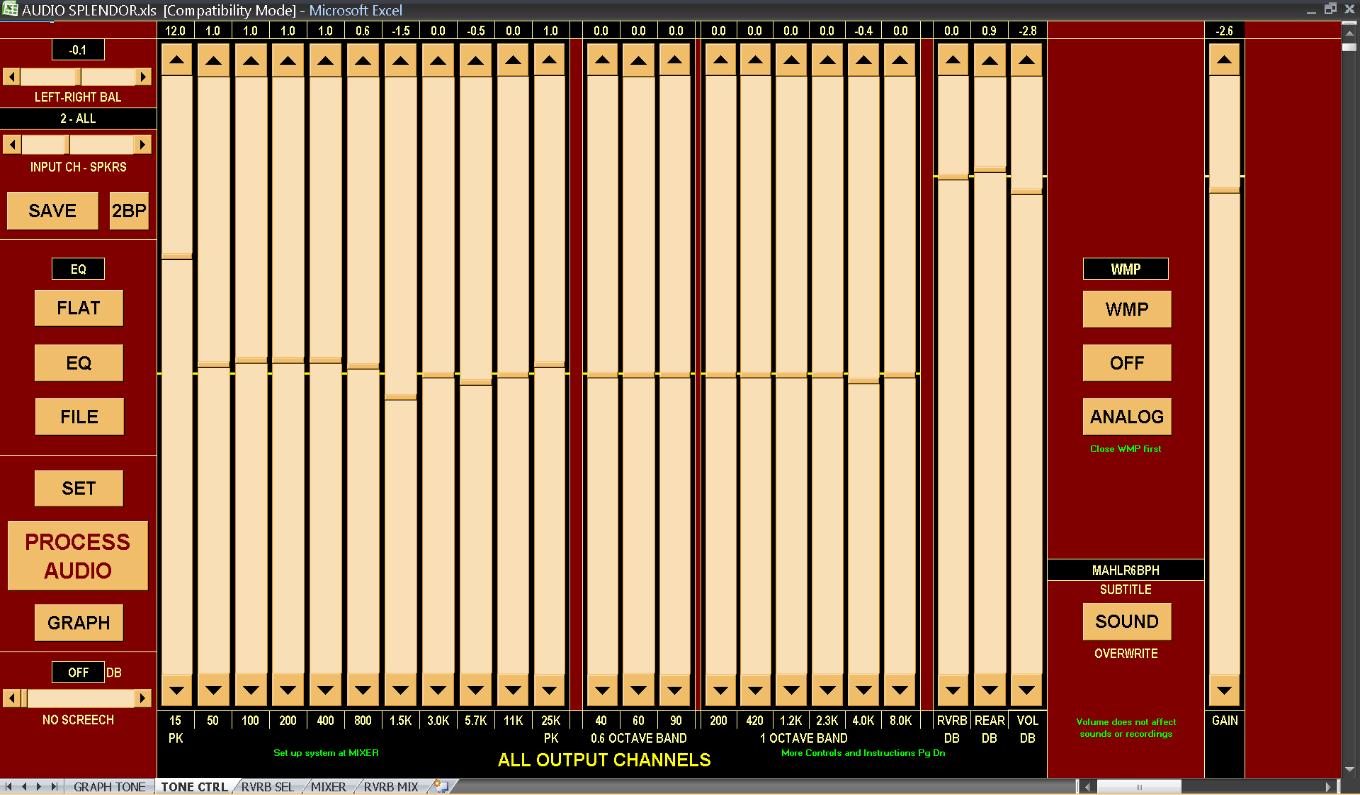
| 11 tone sliders at left and the VOLume slider control all channels. |
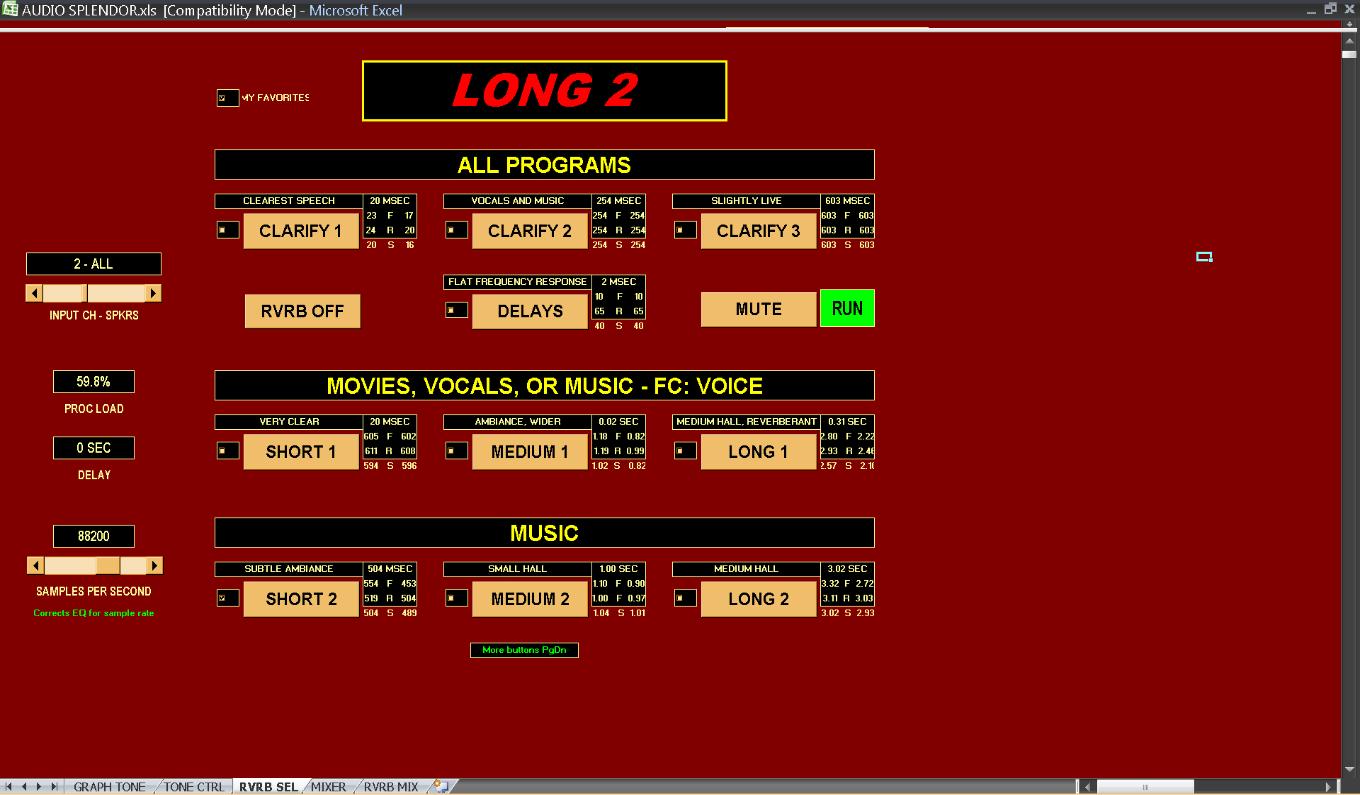
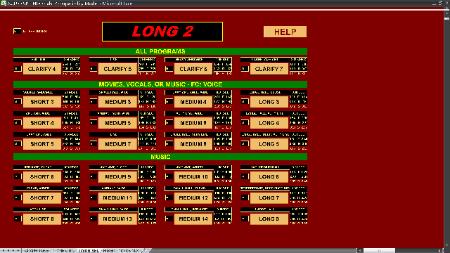
| Top of the Reverberation Selector screen. Pg Dn 12 times for additional buttons. |

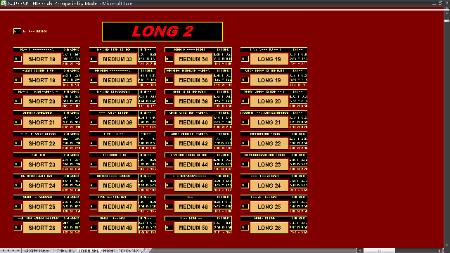
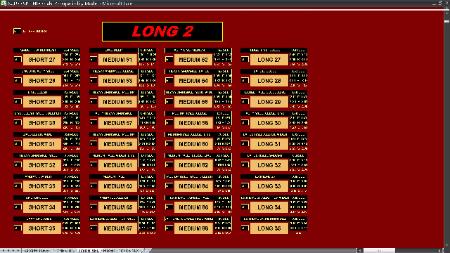
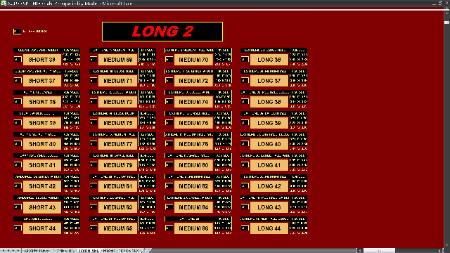
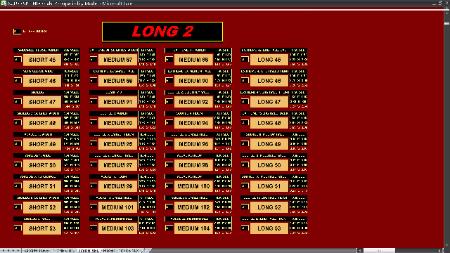
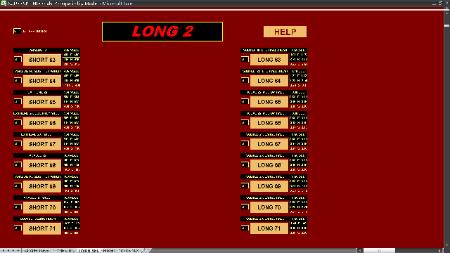
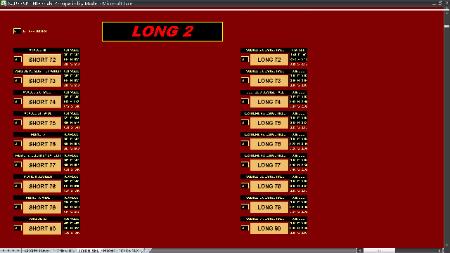
| There are 313 different reverbs consisting of 7 Clarify, 87 Short, !20 Medium, 99 Long, plus 1 set of delays. 22 are ANALOG and 60 are EXTREME. |
SAVING YOUR SETTINGS
MIXER and RVRB MIX
If you are using a custom mix or reverberation mix, you must both save and recall your custom mix before saving the TONE CTRL settings. Your recalled
settings will show up in FILE mode. If you forget, and leave the settings in MIX mode, a dialog box will remind you when you try to save the TONE CTRL
settings.
In MIXER, clicking SAVE MIX copies the current mix settings to the MIX LIB window in SPLENDOR LIBRARY.XLS, appearing as the CURRENT mix on
line 11. Copy line 11 and paste special, values, into the desired row according to green instructions on line 23. Press CTRL + S to save the workbook.
Recall the new mix by selecting its entire line (click its line number at left) and clicking MIX SET.
RVRB MIX works the same way and your new mix appears at AMBIANCE LIBRARY.XLS, RVRB MIX LIB, line 11.
TONE CTRL
Click SAVE at upper left to copy all your settings to SPLENDOR LIBRARY.XLS, TONE LIB, PROGRAM LIBRARY, line 15. Type the music information
you want and click PROG SAVE. This copies line 15 to the library, sorts alphabetically, and renumbers the entries. If you are replacing previously saved
settings, first select the library line and delete it. Press CTRL + S to save the entire SPLENDOR LIBRARY.XLS. Recall your settings by selecting the
entire desired line and then click TONE SET (or CTRL + SHIFT + T). You can automatically recall your track settings from the Windows Media Player
(WMP) by typing a unique 5 or more character SUBTITLE on both line 15 and in WMP. Click CONCERT to go to a section where you can copy and
paste special, values, the entries you want for a special occasion.
SPEAKER and SOURCE COMPENSATIONS
After acquiring some skill at optimizing your sound and saving settings, you should save compensations for your speaker system and headphones. The
SPEAKER slider at left in the TONE CTRL window (Pg Dn) selects up to 15 different tone and balance characteristics for various rooms, speakers with or
without a subwoofer, and headphones. Using highest quality music sources find tone control settings that are a best compromise for balanced sound and
extended high and low frequencies. When you save the settings they appear not only at SPLENDOR LIBRARY.XLS, TONE LIB, PROGRAM LIBRARY,
line 15, but also in the SPKR LIB section of the same window, line 49995, and in the SRC LIB, line 59995.
Click the SPKR LIB button to get to line 49995. Type a suitable name and remarks, click line number 49995 to select the line, copy and paste special,
values, to any of compensation numbers 1 – 15. Click SAVE LIB to copy this library to AUDIO SPLENDOR.XLS where it is accessed by the SPEAKER
slider in TONE CTRL.

| Difference sliders provide complete control of each channel when they cannot all be treated equally. SPEAKER and SOURCE switches select equalization for 15 speaker systems or headphones and 15 sources that adds to tone slider settings. |


INSTRUCTIONS
Near the bottom of the TONE CTRL window essential instructions in green are enough to enable you to operate AUDIO SPLENDOR with the Windows
Media Player (WMP) or with BURWEN AUDIO for analog inputs. Clicking HELP opens these more detailed instruction pages on the web.
AUXILIARY PEAKING CONTROLS
The 15 PK and 25K PK controls below provide additional extreme low frequency and extreme high frequency boost or cut, the same as the 15 PK and
25K PK controls in the topmost view on this page. Combined the maximum boost or cut is 60 dB in 0.1 dB steps at 15 Hz and 25 kHz with slope as great
as 12 dB/octave. The fast slopes are useful for extending or reducing the frequency range of speakers or program material. They may be used in
combination with peaking controls at the right in the topmost view to add or remove corner peaking.


SUBWOOFER CONTROLS
Extremely flexible low-pass and boost-cut filtering for a single subwoofer is controlled at the bottom of the TONE CTRL window. You can cut off high
frequencies at from 6 to 24 dB/octave and boost or cut more than 60 dB with 8 peaking controls from 15 Hz to 50 Hz. Adjust the controls by ear using a
variety of wide range program material. For better fidelity separate subwoofers using their manufacturers crossovers for each channel, or at least FL and
FR are preferable. Use the main tone and difference controls to set up your saved speaker compensation.
| Additional peaking at 15 Hz and 25 kHz and essential operationg instructions |
GRAPH FREQUENCY RESPONSE
Clicking the GRAPH button in the topmost view shows the frequency response produced by the tone slider settings. The graph is as accurate as you can
read it and it correctly adjusts for the sample rate set. Normally Windows Media Player output is up-sampled to 88.2 kHz and the default sample rate for
BURWEN AUDIO is 88.2 kHz.
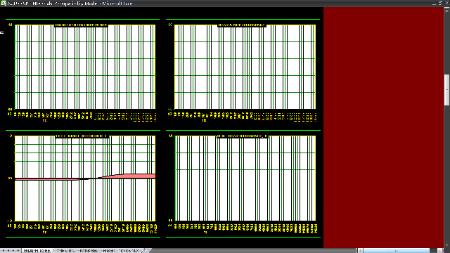
The second graph below shows the total frequency response including Speaker and Source equalization. In the small graph below none is used. Six
smaller graphs show differences in frequency response produced by the 6 sets of difference controls above.
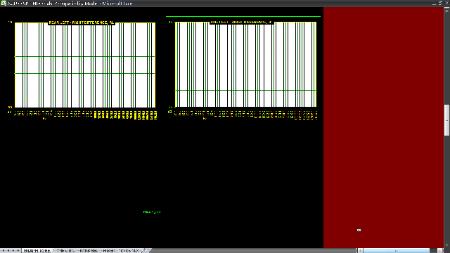
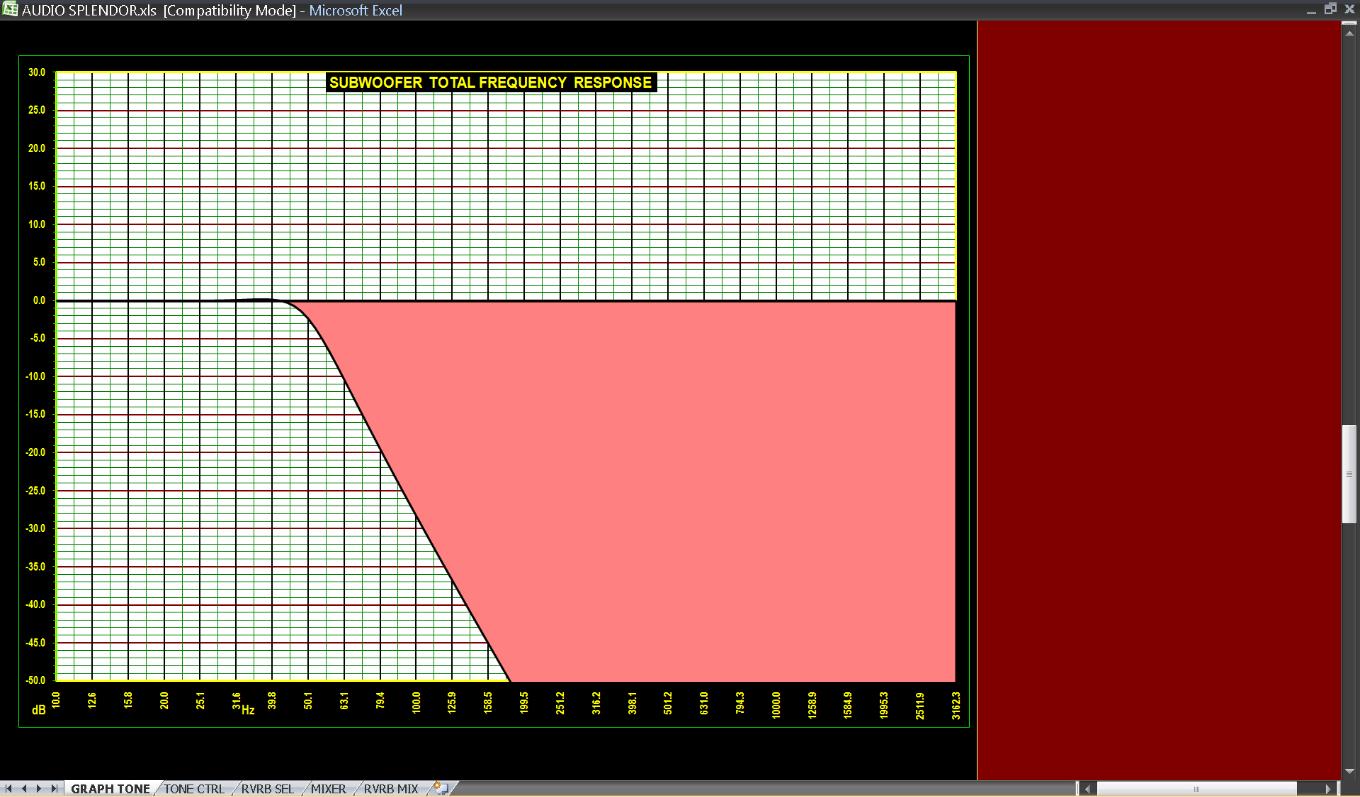
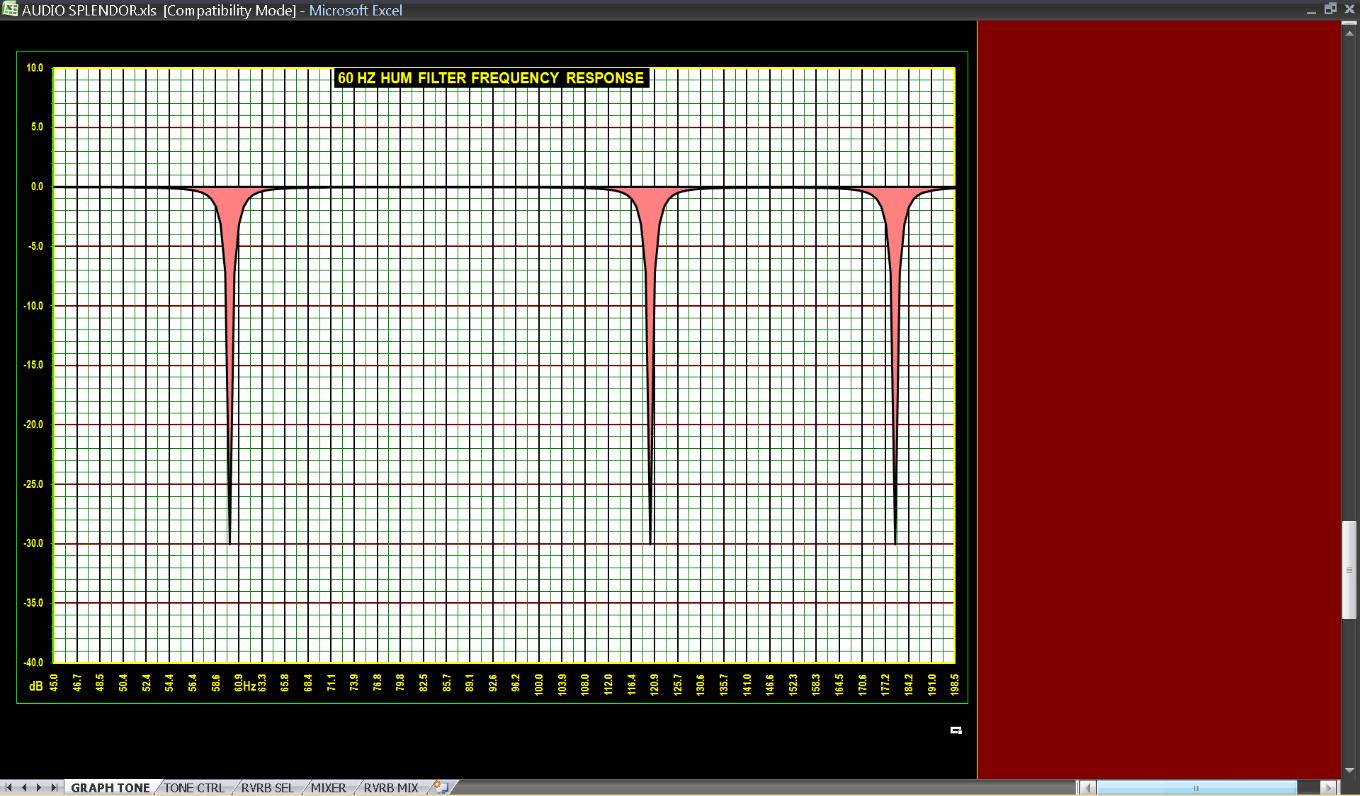
Large graphs below show the subwoofer frequency response, and the very narrow notches at 60, 120, and 180 Hz produced by the 60 Hz hum filter.
Clicking the GRAPH button in the topmost view shows the frequency response produced by the tone slider settings. The graph is as accurate as you can
read it and it correctly adjusts for the sample rate set. Normally Windows Media Player output is up-sampled to 88.2 kHz and the default sample rate for
BURWEN AUDIO is 88.2 kHz.
The second graph below shows the total frequency response including Speaker and Source equalization. In the small graph below none is used. Six
smaller graphs show differences in frequency response produced by the 6 sets of difference controls above.
Large graphs below show the subwoofer frequency response, and the very narrow notches at 60, 120, and 180 Hz produced by the 60 Hz hum filter.
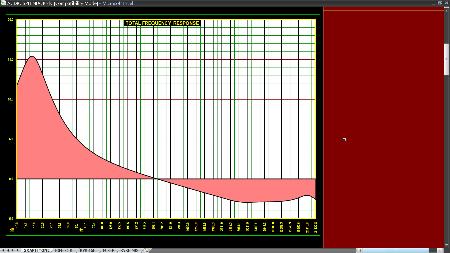
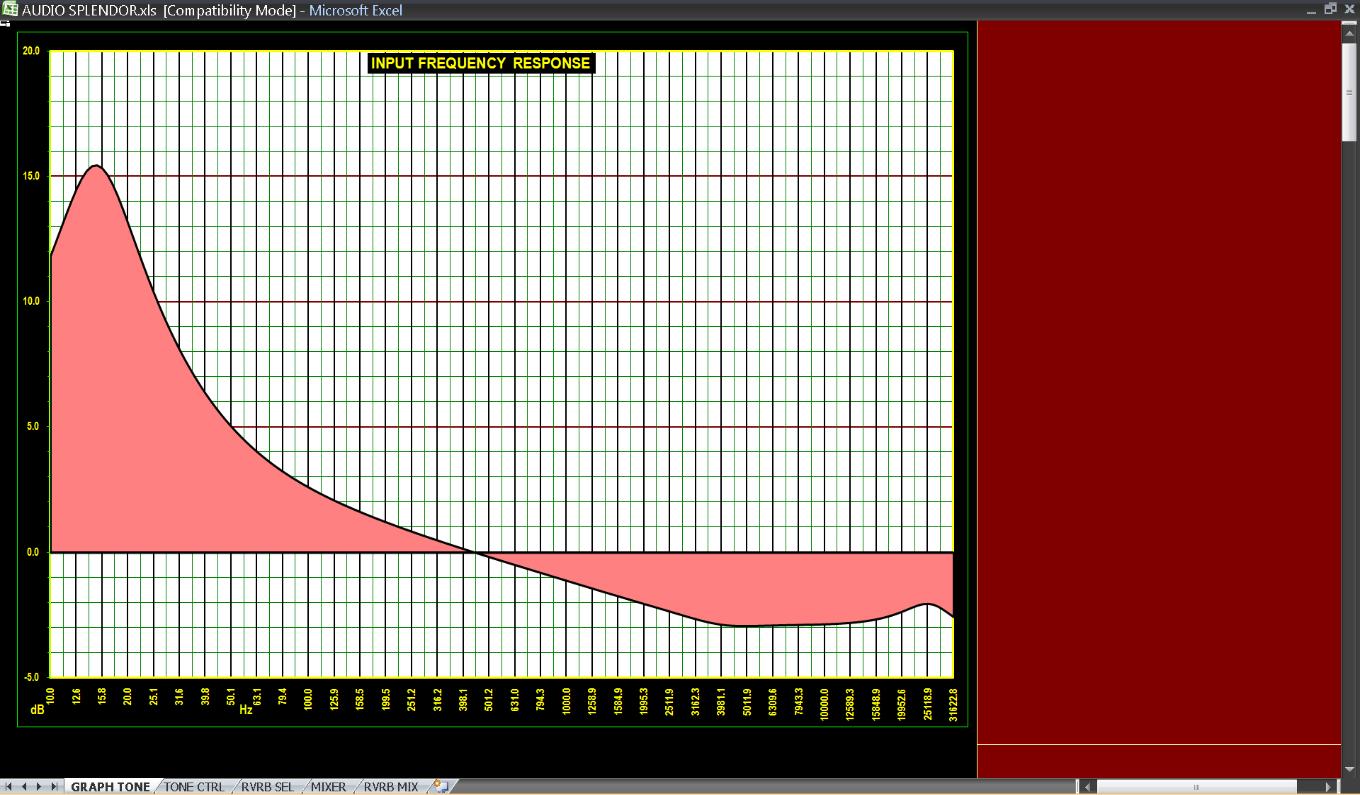
| Frequency response graph shows the combined effects of the tone sliders, automatically adjusted for near constant volume. |
Total frequency response 6 difference response graphs produced by difference controls above
| Subwoofer frequency response set for 24 dB/octave with no additional equalization |
| The 60 Hz hum filter consists of 3 resonant notches at 60, 120, and 180 Hz. Each has a Q of 1000 and attenuates 30 dB. 50 Hz can be selected. |
MIXER AND RVRB MIX
For practically every combination of 1 to 8 inputs and 1 to 7.1 channels out there is a fixed mix available using the 43 position INPUT CH - SPKRS switch.
Each position determines a mix for the direct signal and a separate mix for the high frequency reverb signal which is made from the direct signal mix. The
most common settings are 2 - 2 for stereo in to stereo out, 2 - ALL for stereo in to multichannel out, and 8 - ALL, FC MIX for movies.
The 2BP button below the INPUT CH - SPKRS switch in the topmost view toggles between the mix setting and 2-channel Bypass for quick comparison.
Below are the 43 switch positions.
By blending the left and right channels in-phase or out-of phase, the perceived width of the stereo image is made wider or narrower than the speaker
spacing in some of the mixes.
|
MIXER and RVRB MIXER
The input mixes, and corresponding reverberation mixes, in dB selected by the 43-position INPUT CH – SPKRS selector (duplicated in each control
window), show at the tops of the sliders in each of these windows. You can customize either type of mix by clicking its MIX button and setting the controls
to your liking. Compare your settings (click MIX) vs. saved custom settings (click FILE) vs. NORMAL (click NORMAL). The check boxes invert phase.
Each slider is a 301 position switch with a range from -50 dB to +10 dB in 0.2 dB steps and OFF.
In the MIXER window the 7 speaker output buses, FL, FC, FR, RL, RR, SL, and SR each have an 8 to 1 input mixer for FL, FC, FR, RL, RR, SL, and SR
inputs plus AUX. The auxiliary input might be used for announcements. At bottom left of the second screen is a mixer for sending FC to all the other
speakers in any desired proportion and with its own reverb. It has a GAIN control with a +/- 30 dB range in 0.2 dB steps. The mixer at bottom right sends
the 7 speaker bus outputs to the subwoofer equalizer in any proportion. It's master GAIN control covers -50 to +10 dB and OFF.

| Direct signal MIXER main screen. Sliders range from -50 dB to + 10 dB in 0.2 dB steps plus OFF. |
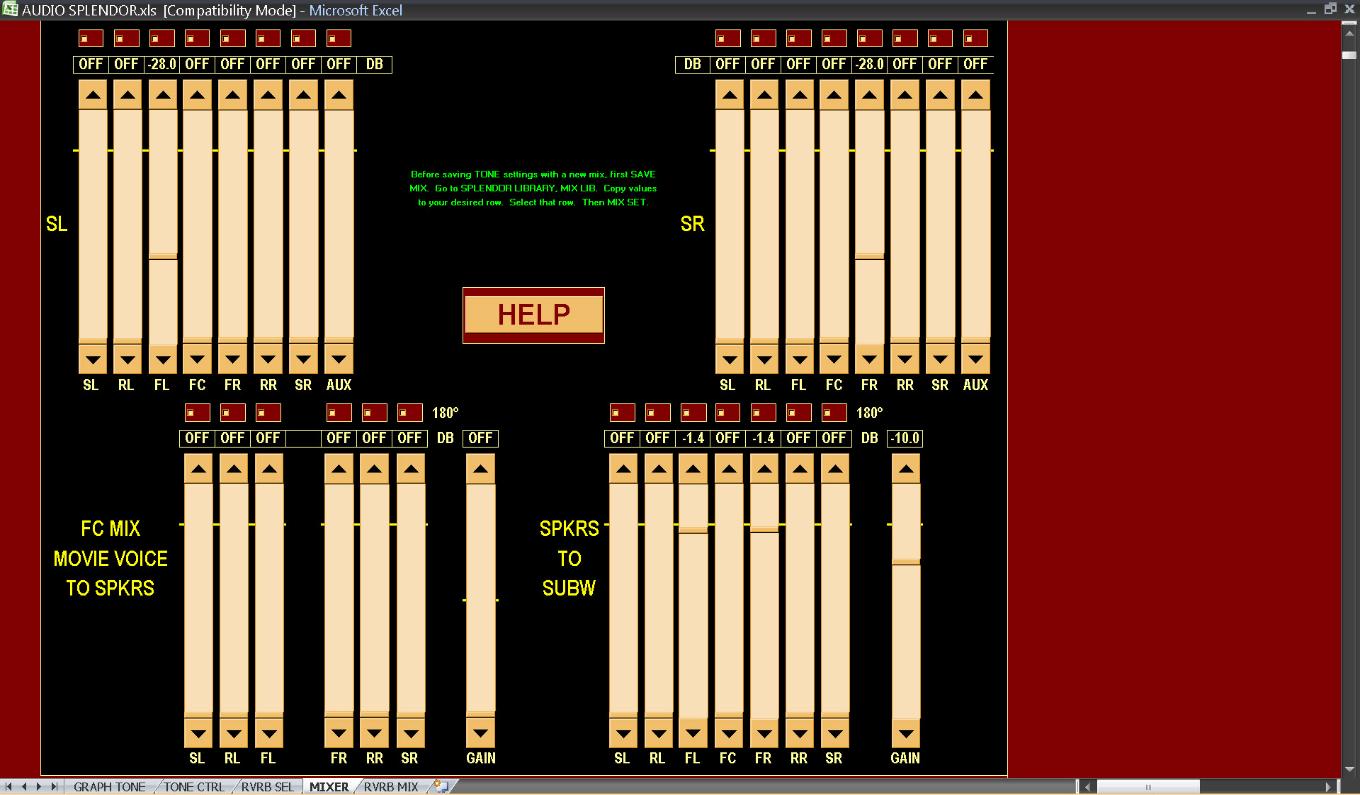
| Direct signal MIXER showing side channels, FC mixer, and Subwoofer mixer |
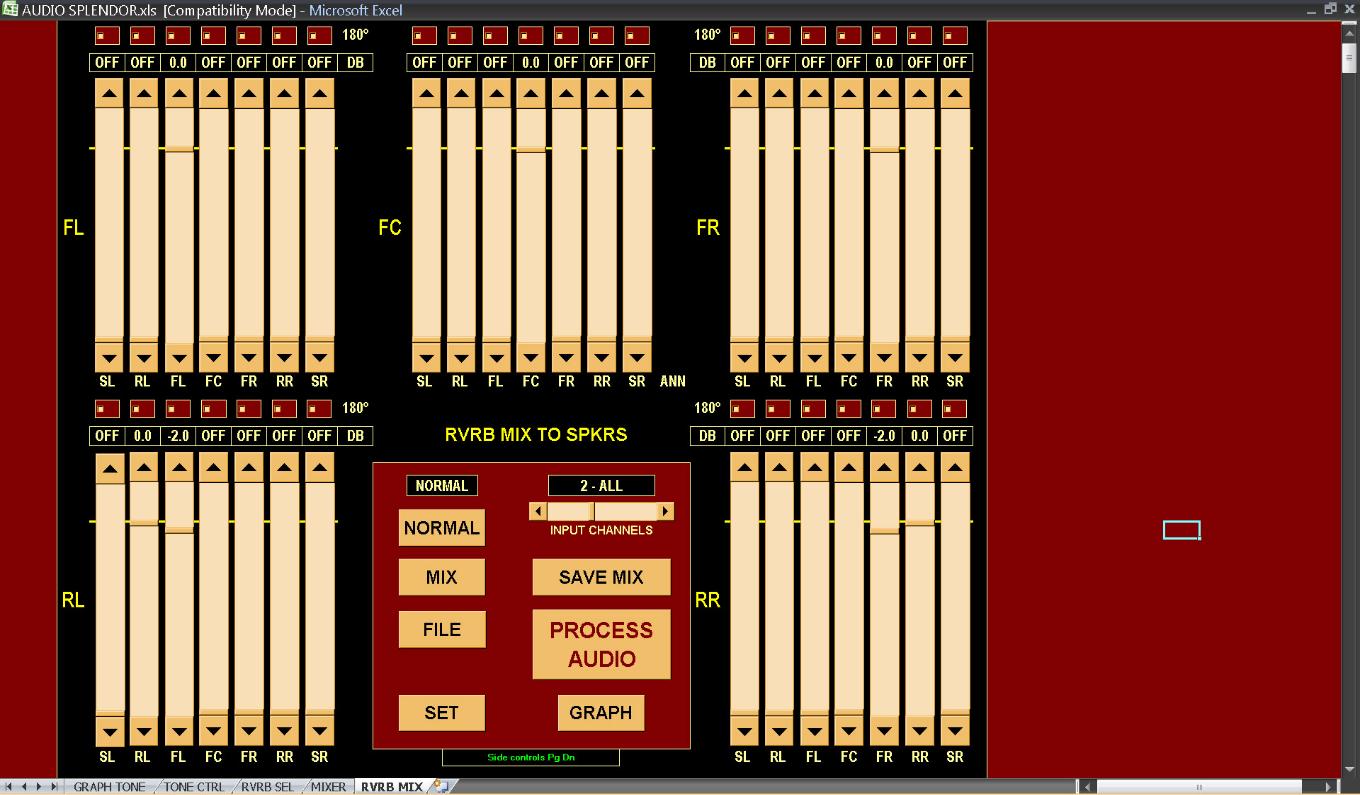
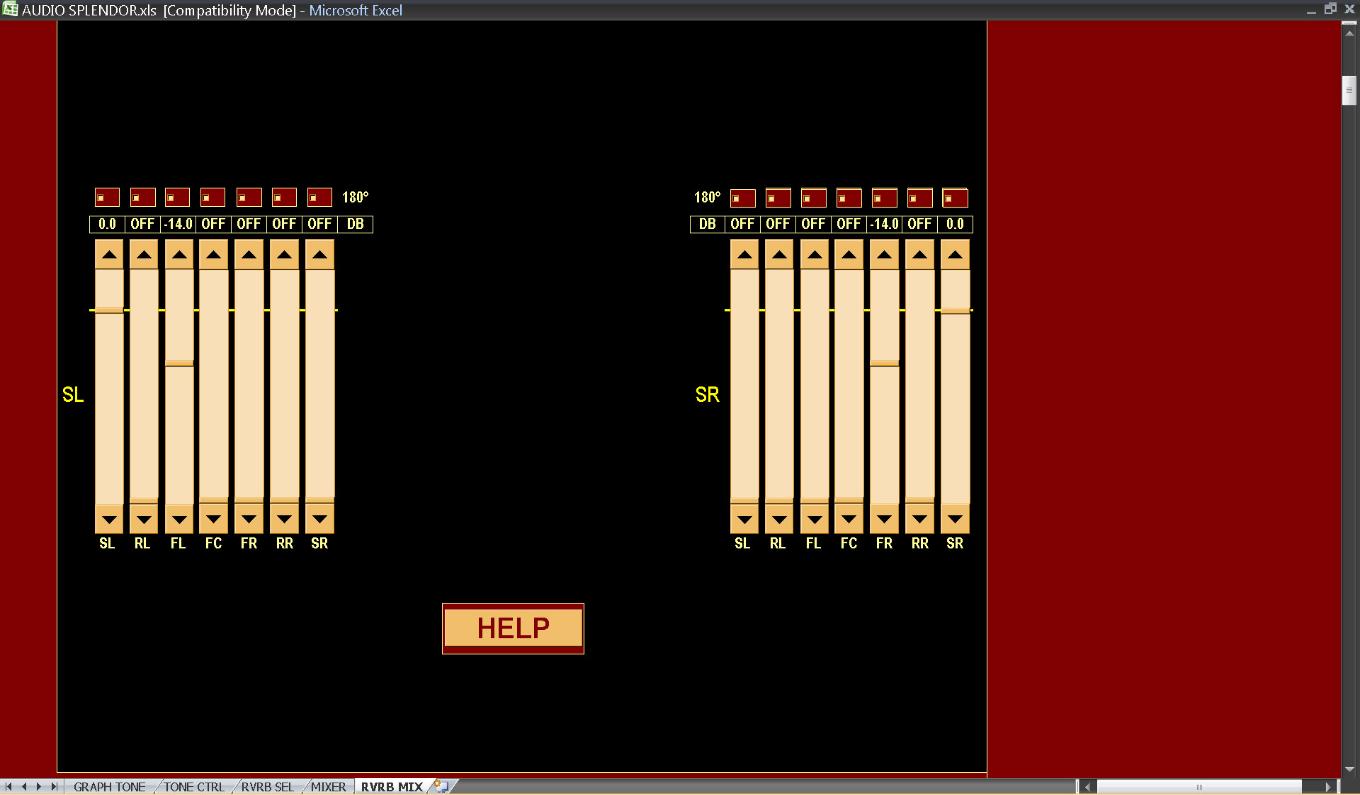
The RVRB MIXER is simpler. It consists of a 7:1 mixer for each of FL, FC, FR, RL, RR, SL, and SR.
| Main screen of the 7:7 RVRB MIXER showing front and rear channels |